Oleander
Registered Moth-er
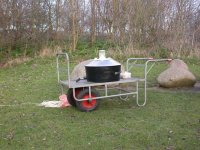
Here's some pictures of my new trap that I've built. I am really proud of it! o I have no water proof choke so it is screwed to the bottom. I think mine is one of those that usually lampposts have.
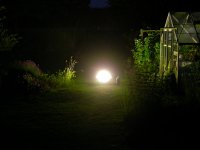
Would be fun to see other traps and the area where you trap!
I have no water proof choke so it is screwed to the bottom. I think mine is one of those that usually lampposts have. Would be fun to see other traps and the area where you trap!